We all know that WordPress powers 24% of the internet and growing stronger day by day. More than 50000 websites are created using WordPress every single day. It is the most powerful hosting platform and is the easiest way to create a free website or blog in no time. Before setting up and configuring your custom domain using WordPress, you can always install WordPress locally for testing or learning or to develop plugins for the same. All the plugin developers and theme designers install WordPress in their personal computers on a local server environment to build, test and double check whether everything is fine. People who use WordPress for maintaining their personal sites, professional bloggers and all other users could install WordPress in their machines to test the themes, plugins and ensure that setup is perfect to deploy the changes to server copy. It is always a good habit to test the changes locally before deploying the same to server so that we are sure that nothing is going to break on server.
Now that we know, why do we need to install WordPress in our personal computer, let’s see how to do it in easy steps.
In this article we will learn to install WordPress in Windows using Wamp Server or WAMP in short. WAMP is a Windows web development environment and is combination of Apache2, PHP and a MySQL database. Let me not focus on technical details and confuse you more. To keep it simple, WAMP needs to be installed in your computer to setup a local server environment so that WordPress could be installed. There are many other clients similar to WAMP but I personally recommend WAMP. It is easy to use and free.
Step 1 is to install Wampserver in your computer.
Visit the WampServer website website and download the latest version.
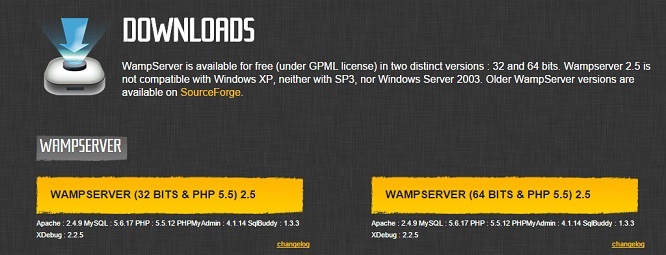
Note: There will be two options. 1.WampServer 32 bits 2.WampServer 64 bits. Download the correct one based on your system configuration. Before installing WampServer, make sure that Visual C++ Redistributable for Visual Studio is also installed in your PC. The link to download is available in the WampServer site.
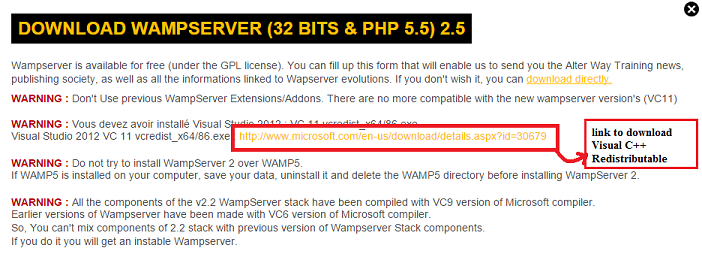
Please find the screenshots below to kick start with the installation procedure.
After downloading WampServer, just run the installation program and follow the setup instructions seen on screen and choose your preferences while installing. During installation there would be multiple points where you need to give your input.
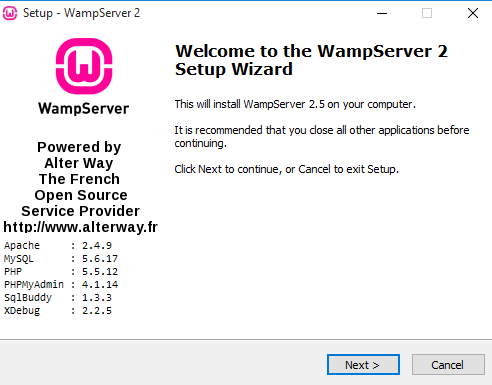
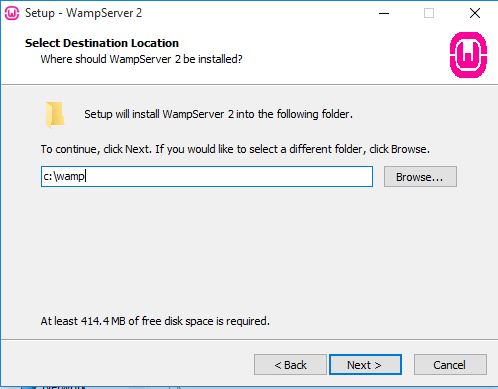
Select the folder where you want the WAMP to be installed.
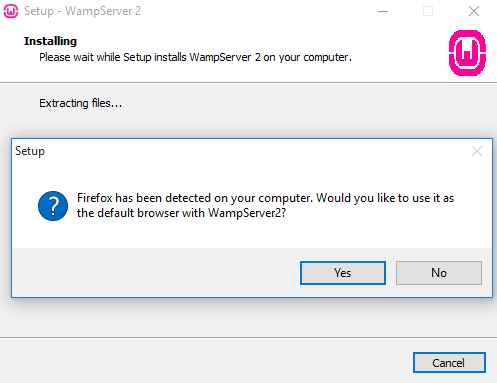
At one point it will ask for default browser and you can choose whichever browser you like.
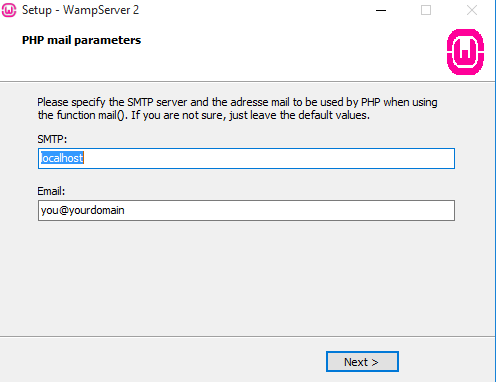
At one step it will ask for PHP mail parameters. Remember not to change the default values you see on the screen if you do not know about it. After the installation is complete, you have to launch WampServer.
Step 2 is to create database to install WordPress
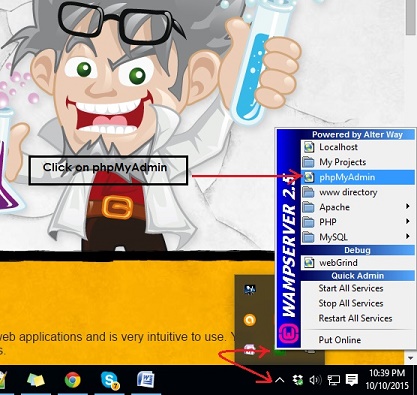
Navigate to windows task bar and click on WampServer icon and click on phpMyAdmin. phpMyAdmin allows you to easily manage your databases. We will be creating a database now using phpMyAdmin to install WordPress.
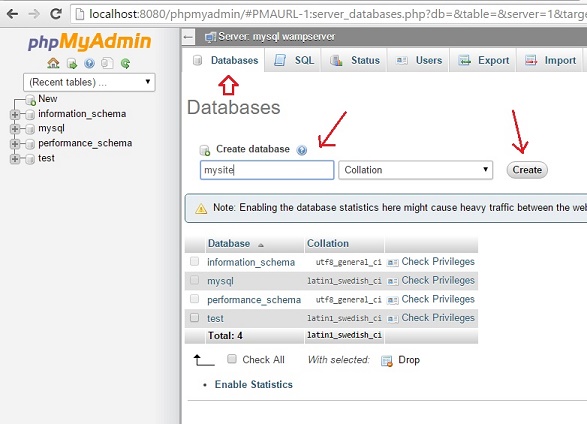
After clicking on phpMyAdmin, a new browser window will be opened.Click on ‘Databases’ to create a brand new database for WordPress. Give a name for database and click on Create button. For the sake of this tutorial, I have created a database with name mysite.
Step 3 is to install WordPress in your Windows PC using WAMP
Visit WordPress.org and download latest version of WordPress. After downloading WordPress, extract the zip file and copy the complete folder. Now navigate to the following location (C:\wamp\www) and paste the copied wordpress folder there. You can rename the wordpress folder to anything of your choice.You can rename it to your website’s name. I have renamed the wordpress directory to spinfold. Now open your browser and visit the following URL – http://localhost/spinfold/
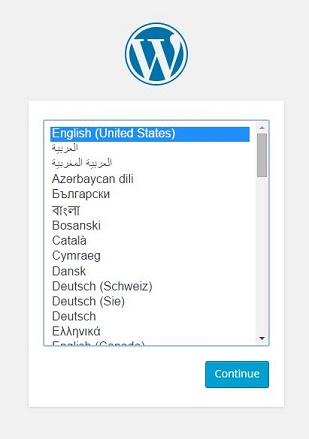
After visiting the URL, in the first screen, select language of your choice and click on Continue.
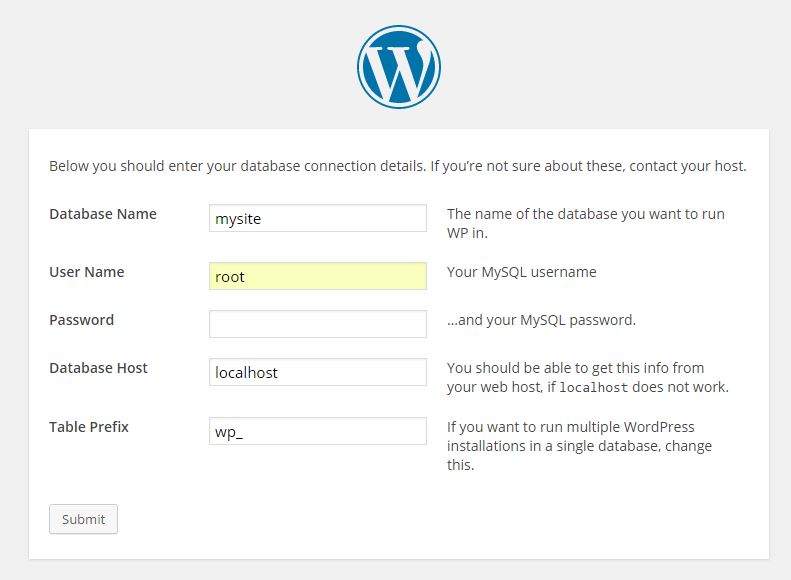
In the next screen you have to provide the database connection details. The database name has to be the one which you have created in the previous step using phpMyAdmin. I will be giving the Database name as mysite as I have created the database with that name in the previous step. Give the username as root and leave the password blank. Do not change the value ‘localhost’ in Database Host and leave the default value as it is for Table Prefix as well. The below screenshot will depict the same.
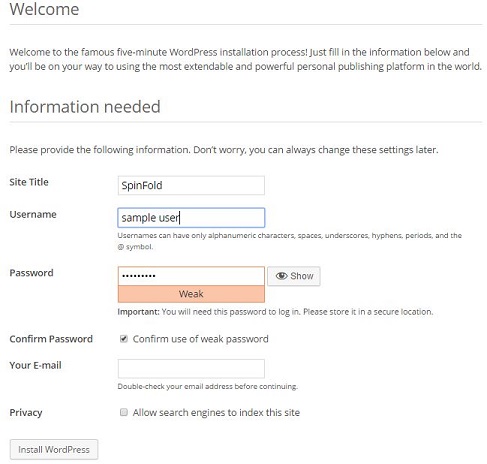
After you click on Submit, you will see a message saying “All right, sparky! You’ve made it through this part of the installation. WordPress can now communicate with your database. If you are ready, time now to…” Click on “Run the install” button. In the next step fill out the information needed. Give the Site Title, User Name, password, email address and click on “Install WordPress” button at the bottom.
That’s it, in few seconds your WordPress installation would be complete and all the required tables would be created by WordPress. You will be seeing a success message on screen and you could click on Login button to proceed to your dashboard.
Please write in the comments section if you are facing any problem while installing WordPress locally in your Windows PC.
 Spinfold VisualDictionary-Evolutree- Technorip-Amazing Facts and much more.
